The shop on Facebook is an additional optional tab that is added to your page.
This allows you to present products directly on the page and also to link them to web pages. This feature is free of charge.
The products must comply with the Facebook content guidelines. However, these are largely unproblematic, unless you want to sell tobacco products or drugs, which Facebook does not allow. More information can be found in the Facebook Guidelines under the point “Prohibited Content”.
Before starting with the settings let’s talk about the benefits.
Benefits of a Facebook Shop
Tag your products in your posts
As soon as you have your Facebook Shop available, you can start tagging any of the products that appear in your images.
This ensures that everyone who sees your posts will see also the products.
Social engagement
Unlike your website, when people see your products on your Facebook store, they can like them, save them for later, share them with friends, or leave a comment asking a question or sharing their thoughts.
Reduce friction
You want to make it as easy as possible for people to buy your products.
The more steps you make customers do, the more likely they are to give up or be distracted and not complete their purchase.
With Facebook Shop your customers can easily click in your products and finish the purchase.
1. Set up Your Facebook Business Page
To set up a Facebook Shop, you’ll need to create a free Facebook Page for your business. You can’t create a Facebook Shop in a personal Facebook account.
The Facebook Shop feature is only available on Pages.
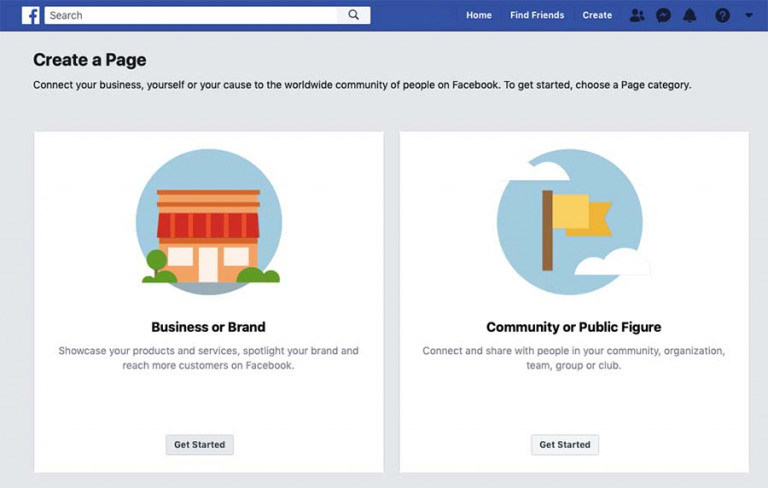
Access Facebook with a personal profile or create a new profile and in the top menu choose to Create > Page.

It will ask you to choose a page category, you can get started with “Business or Brand” that will allow you to showcase your products or services. Or you can go for ‘Community or Public Figure’ to connect with people from your group or club.
2. Create a page
Select the option of “Business or brand”.
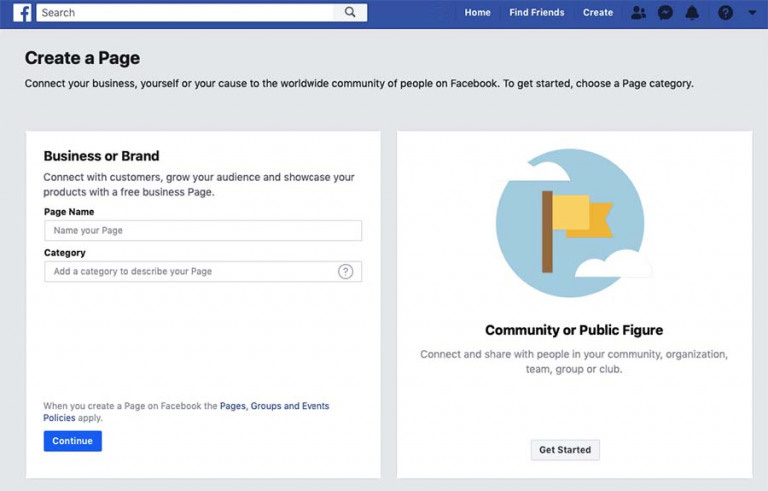
Once the page category is chosen, specify your page name and add a category to describe your page.
3. Facebook page name
Choose page name, category, profile picture, and more information.
When you finish you will have your page created.
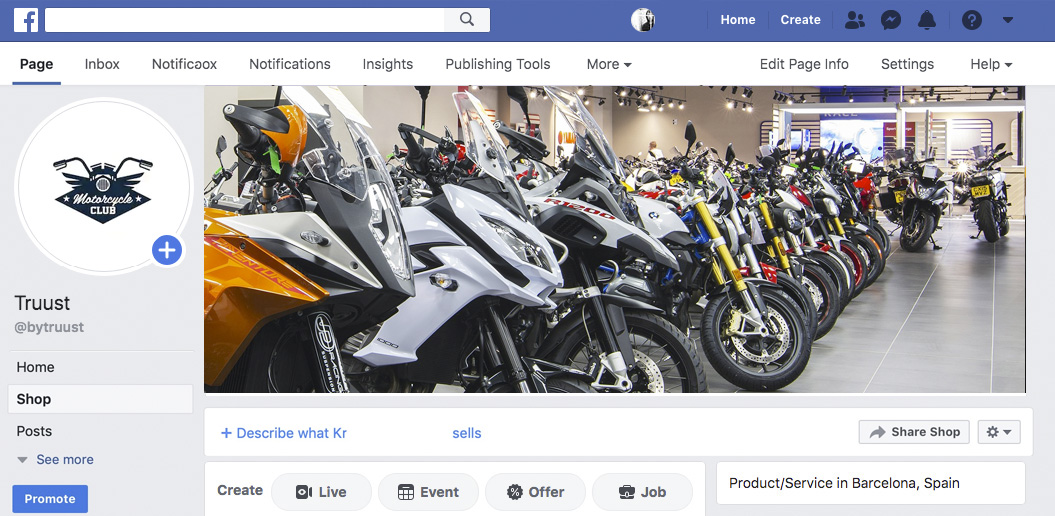
4. Adding the “Shop” tab
From here you can configure the page for selling. If you access now to “Settings” you will be able to see the tabs that you have configured in the “Templates and Tabs” option.
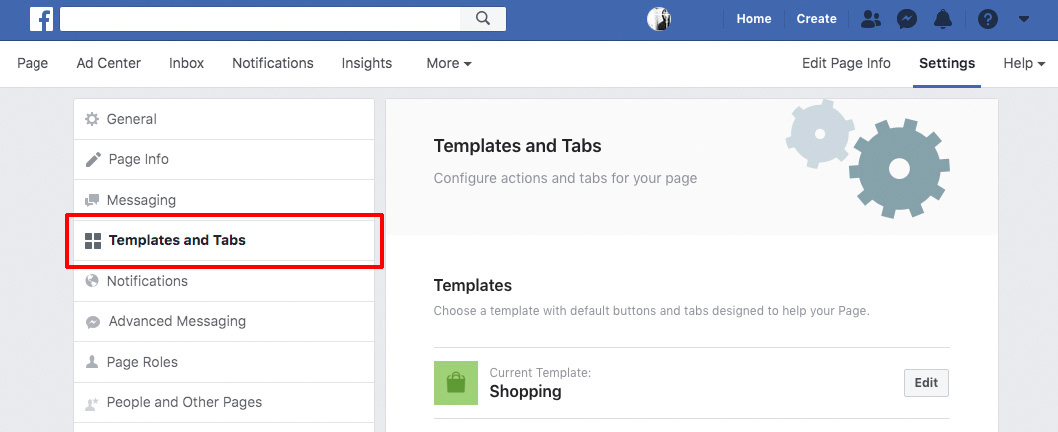
Scroll down the page and click on “Add Tab” and add the shop tab.
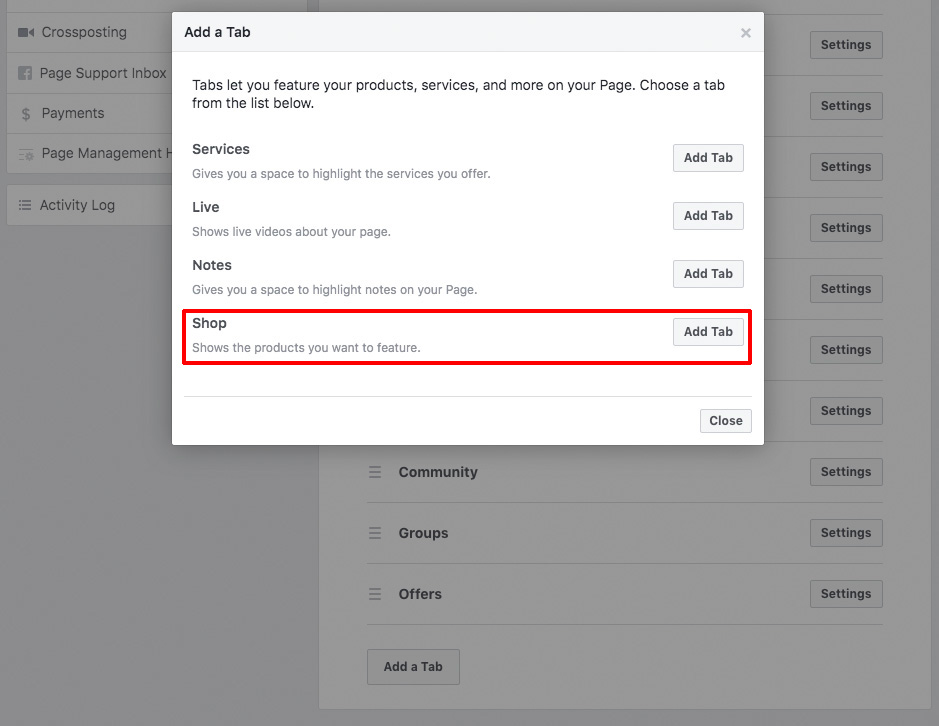
After creating the shop tab, be sure is visible on your left sidebar.
When you first click your shop tab a pop-up window is displayed explaining the setup you are currently going through.
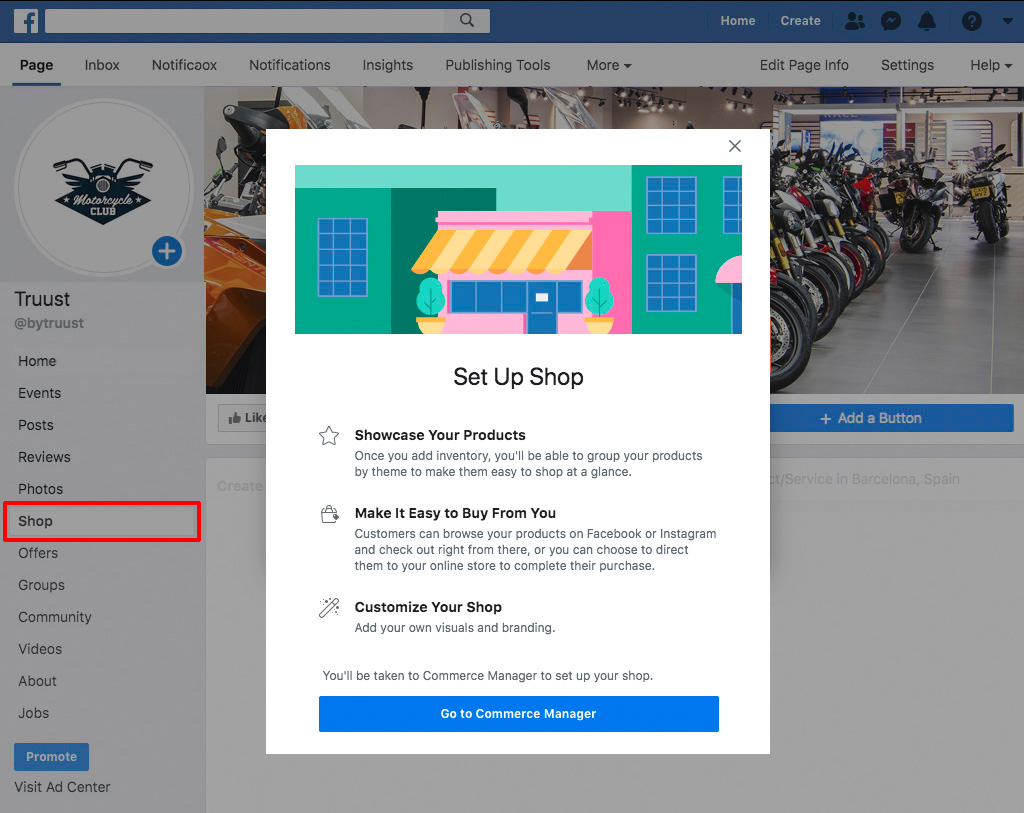
5. Setting up your shop
After creating the shop tab, when you first click your shop tab a pop-up window is displayed explaining the setup you are currently going through.
To use your own website and payment system you should choose Your Website option.
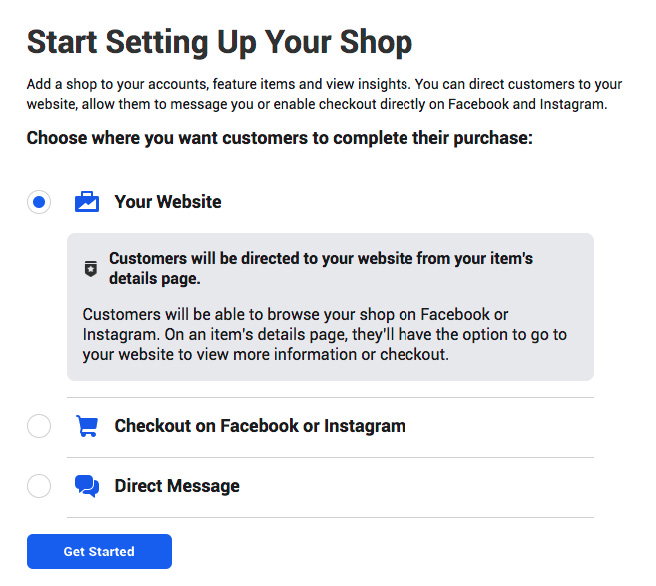
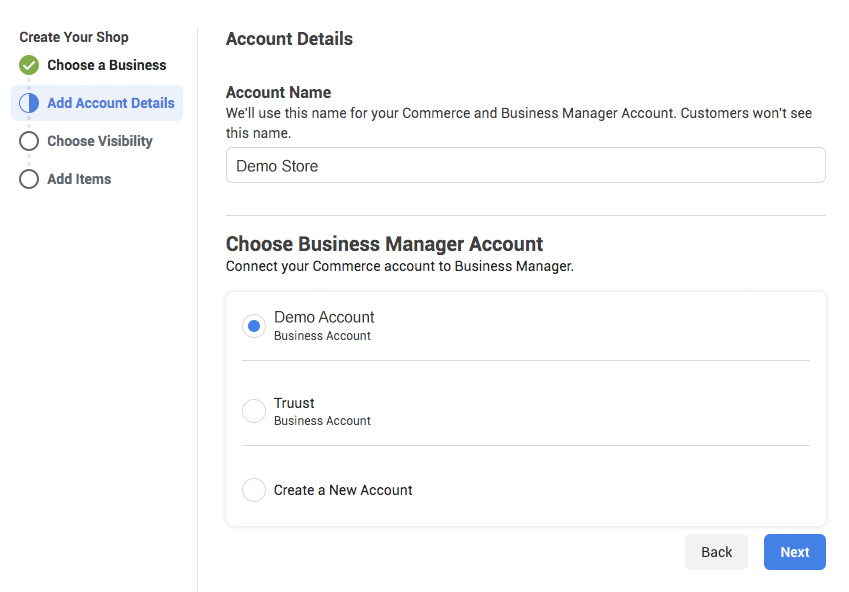
If you have different accounts choose the one you want to set up as a business.
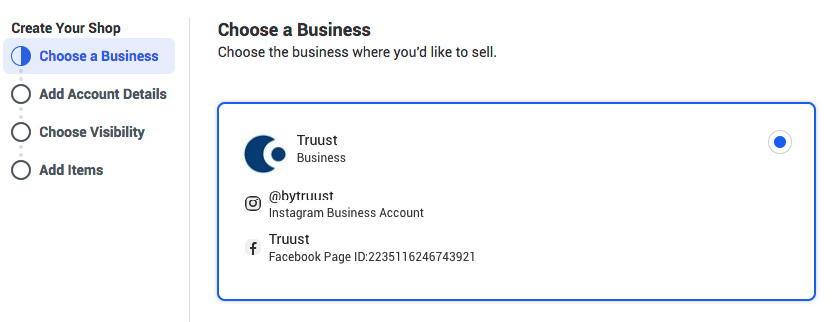
Choose a Business Manager Account or create a new one.
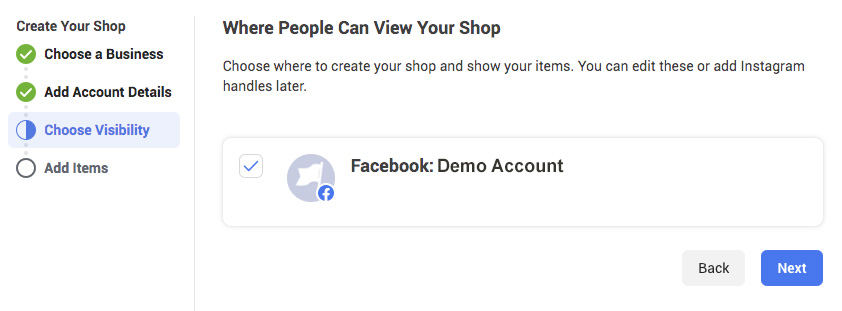
Choose where your products are going to be shown.
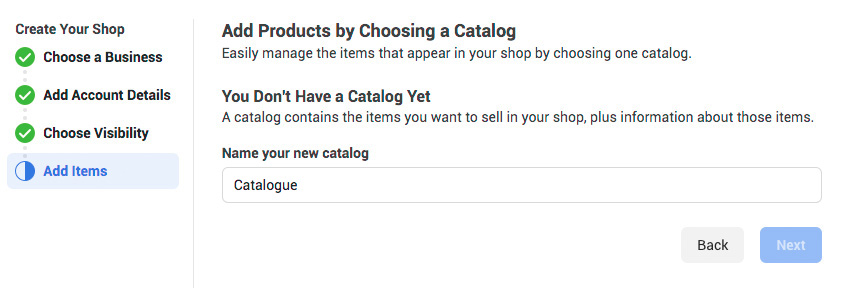
And create a catalogue where your products will be added.
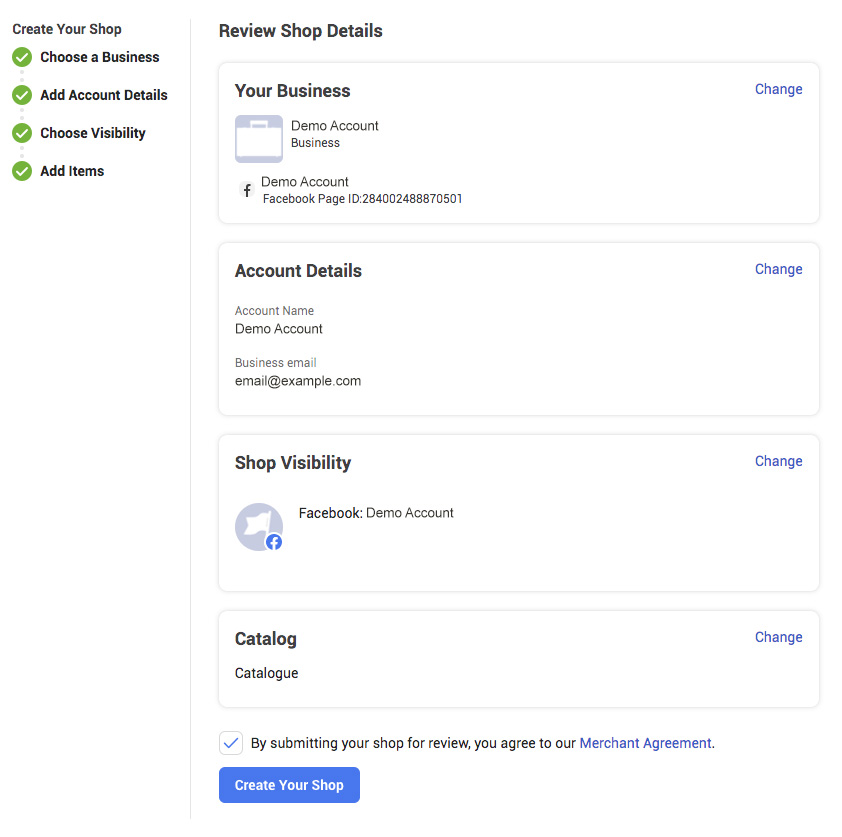
Once you are done with all the steps your shop will be reviewed by the Facebook team to approved.
After your shop is reviewed and approved you will be capable to add products.
6. Adding products
Now, the tab is visible on your left menu it’s time to add products to your shop section.
Click on your Shop tab and Facebook will redirect you to the new setup area.
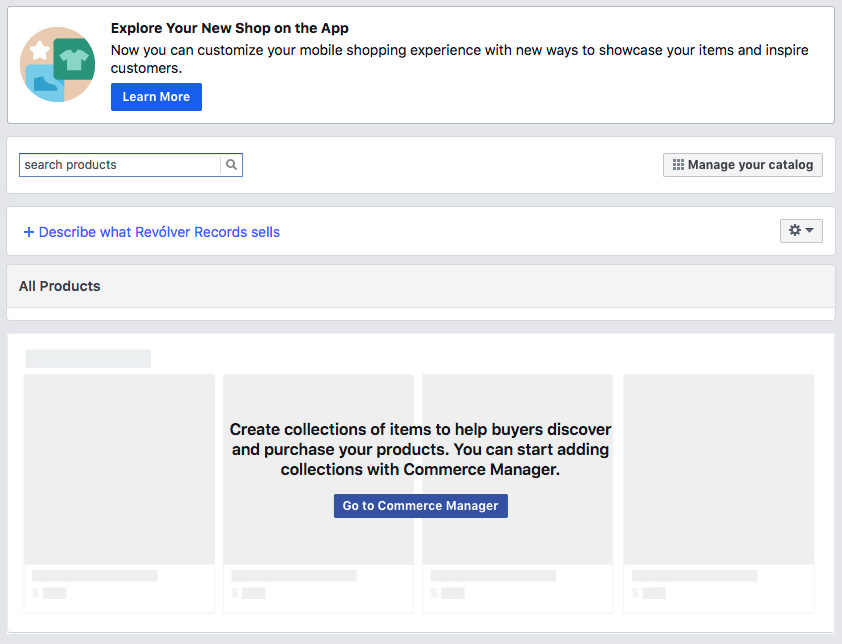 From the overview page, you can choose the action you want to take. Start managing your catalogue.
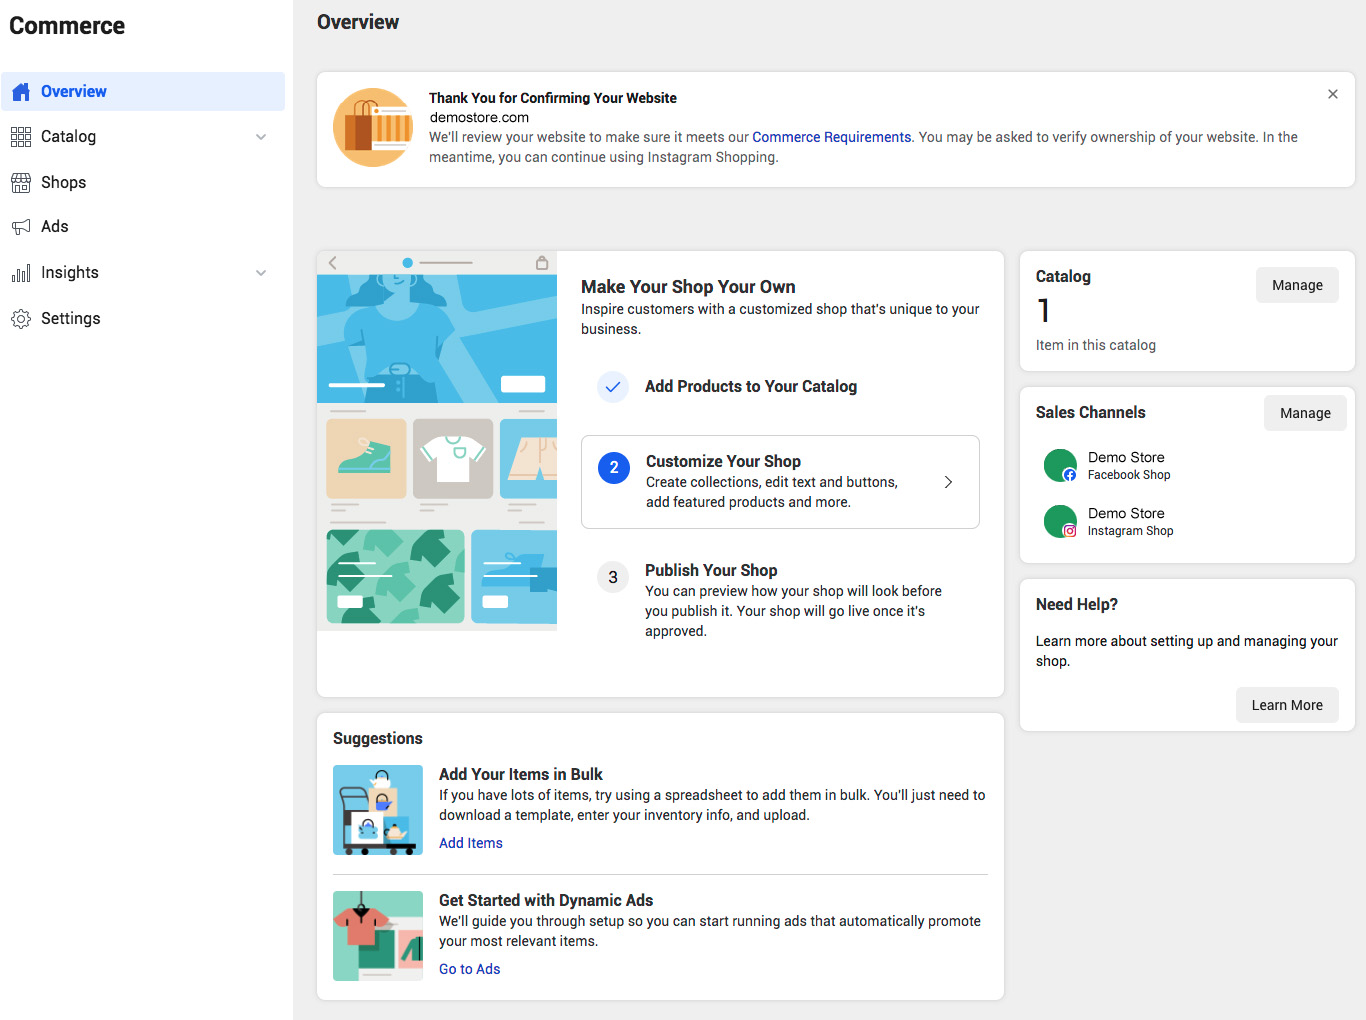
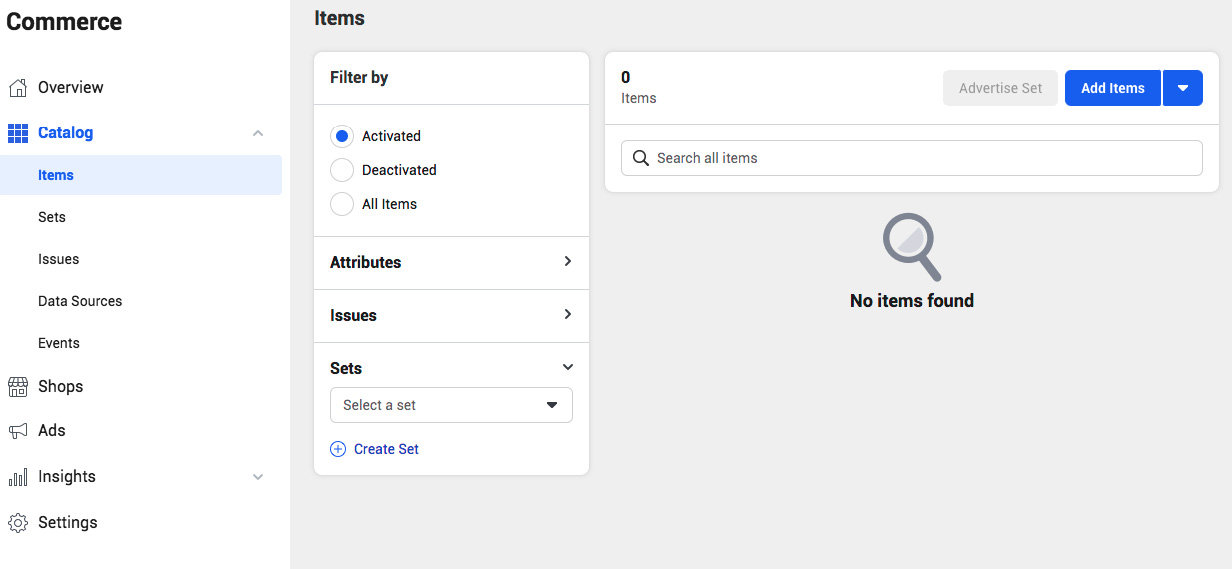
Start adding items. We recommend you first start adding them manually.
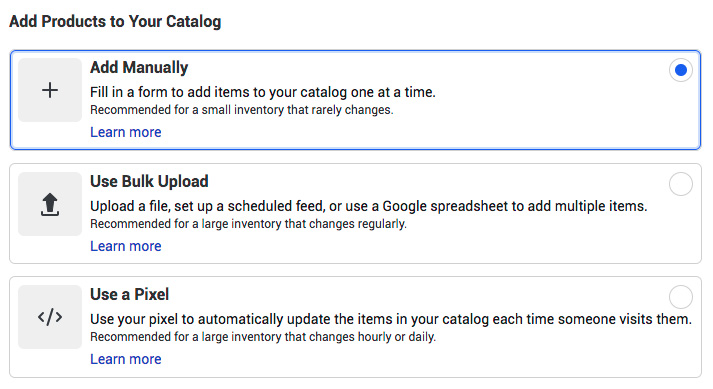
Facebook gives you three choices for adding products to your catalogue: Add each product manually, use data feeds, or connect the Facebook pixel. The data feed and Facebook pixel options are ideal if you have 50 or more items in your catalogue. If you have fewer than 50, go with the manual option.
Specify all the product details.
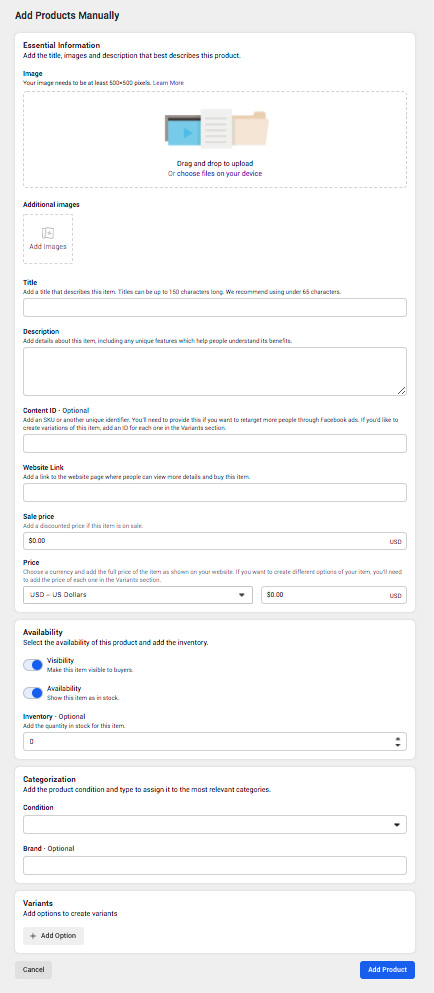
Now, when adding the products you only have to fill in the fields you need.
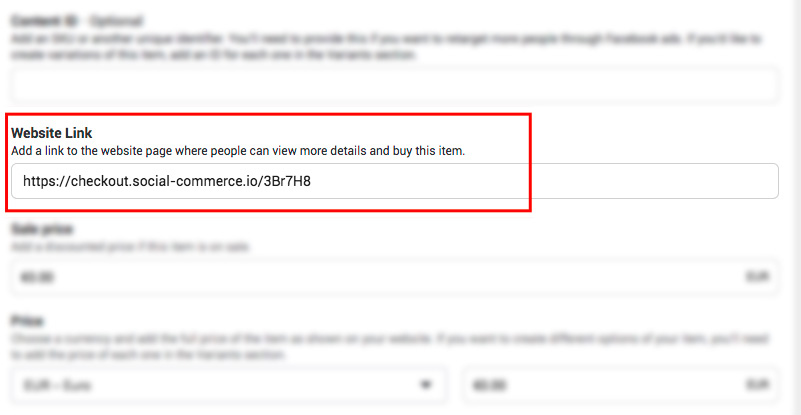
IMPORTANT: You must add the checkout URL of the ad generated with SocialCommerce account.
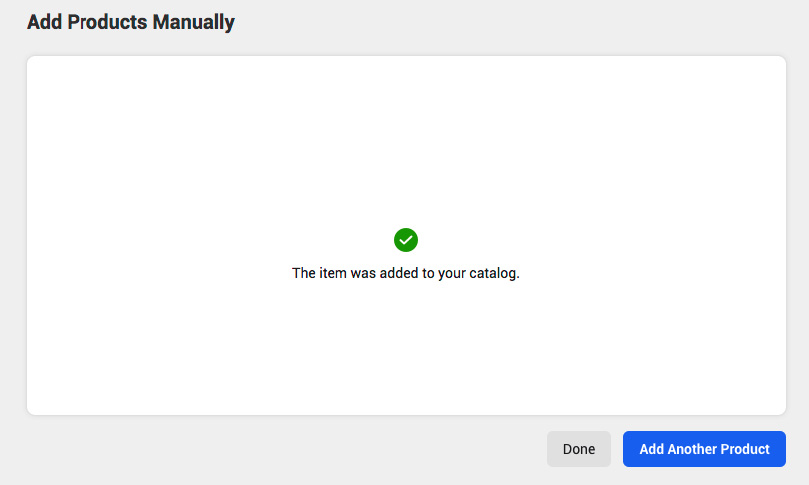
Then click Add Product and a confirmation notification will be shown.
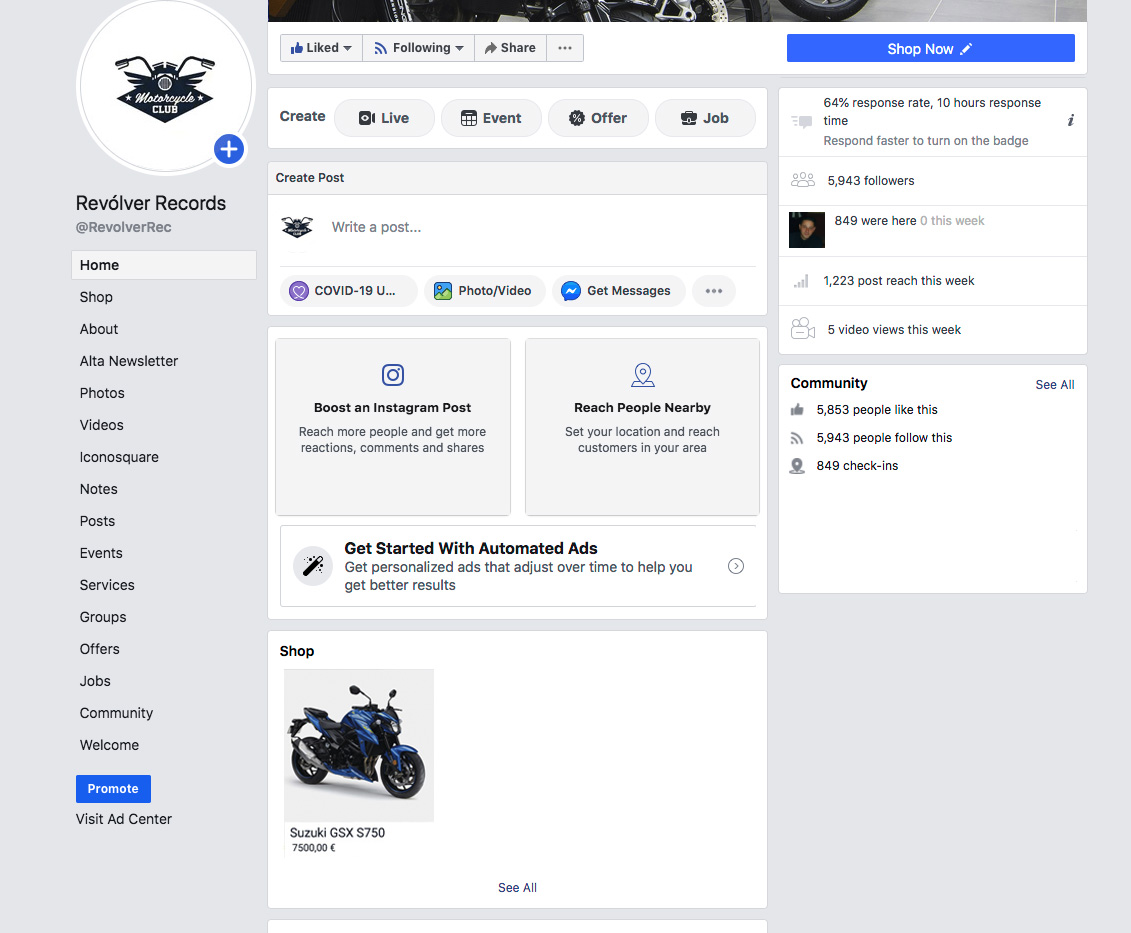
Then on your feed, you will see the new product.
7. Product catalogue
From here on your product will already appear in your catalogue and can be linked to the sale on Instagram.
Summary
Integrating Socialcommerce and Facebook Shop you have an amazing opportunity to boost your sales through your feed.
Please, read also the Facebook Product Image Guidelines
You must:
- You must include at least one image per product.
- Be an accurate image of the product itself.
- Match the title and description of the exact product for sale.
- Not include offensive content like nudity, explicit language or violence.
Ideally, you should use images that:
- Have a white backdrop.
- Are easy to understand and show the whole product.
- Show the product from different angles or viewpoints if you include multiple images.
- Capture the product in real-life situations.
Don’t use product images that include:
- Text, like calls to action or promo codes.
- Time-sensitive information that may become outdated quickly, like price drops for a limited time.
- Watermarks.
